Introduction
I published my first article here over 4 years ago. Well, not exactly here, but we’ll get to that in a few.
It had been over a year since I published any article prior to the end of August. A myriad of reasons all claim a part of “why didn’t I”. Perhaps ironically (for a technical site), one of the reasons was purely technical.
As discussed in an early article, How I Blog, this site is a generated static site powered by Jekyll. Though with all of its simplistic power, like its eponymous origin, there can be a dark side to a Jekyll-based site.
In this article, I’ll go into detail on how I rejuvenated this site, focusing on key technical aspects along the way, and subdued the evil Mr. Hyde.
Changes from Original Site
I’ve made some significant under-the-hood changes to this site since its inception. I’ve even changed the hood and the rest of the exterior.
Site and Domain Name
This site was originally called, PowerShell: What A Novel Idea, and it was hosted (by GitHub Pages) using the Custom Domain of powershell.anovelidea.org.
The domain name heavily influenced the site’s name.
In the summer of 2020, I registered thedavecarroll.com to secure that domain to align with my online identity and brand.
A year and a few months later in November 2021, I made the decision to move this site to the new domain name.
The sites’s focus had primarily been PowerShell and the underpinnings of itself. As often happens, my interests have expanded to include Python and retro-computing. I use Python daily for my day job as a DevOps engineer. In fact, DevOps, cloud computing, and general IT culture are also interests. One day, I hope there will be content focusing on these topics or whatever is most interesting to me at the time. To reflect this shift in focus, I settled on the name Dave’s Technical Journal.
Since the repo name and domain name were the same, it felt right to create a new appropriately named repo. I updated the required files, added the new repo to Travis CI, and added the new domain name as a property in Google Analytics.
Visitor Comments
The next thing I tackled was getting the visitor comments, then powered by Staticman, updated and working. However, by this time, the free service hosted by the Staticman developer was decommissioned because it had overloaded the free hosting platform. I didn’t have the time or energy to go any further, so new site comments were not possible.
Original Build System
In the aforementioned article, I discussed the following three build systems.
- Windows Subsystem for Linux (WSL)
- Google Cloud Platform (GCP)
- Travis CI
The WSL method proved to be too complex for the time and energy (lack of time and energy may surface again) I had available.
The GCP method never came to fruition as it was a hosting solution. The build solution would need to be handled separately.
So I had settled on travis-ci.org but eventually migrated to their travis-ci.com.
I was able to get the site building and committing to the gh-pages branch of the new repo.
GitHub Pages would then deploy my static site from that branch.
As time passed and my energy utterly depleted, Travis CI had nothing to build. I wasn’t writing articles. My site became a dusty archive with nuggets of knowledge strewn about.
Recharged and Ready
Over the last couple months, I’ve been getting more active in the PowerShell online community, tweeting and retweeting, reading the r/PowerShell subreddit, and reading the PowerShell.org Forums.
In fact, it was interaction with a poster from the forums that resulted in a recharge of my energy stores. It proved to be just enough energy/motivation for me to tackle and overcome the technical issues with my site as evidenced by last week’s article.
As promised above, let’s take a detailed look at what has changed and what still needs to be done.
Build System
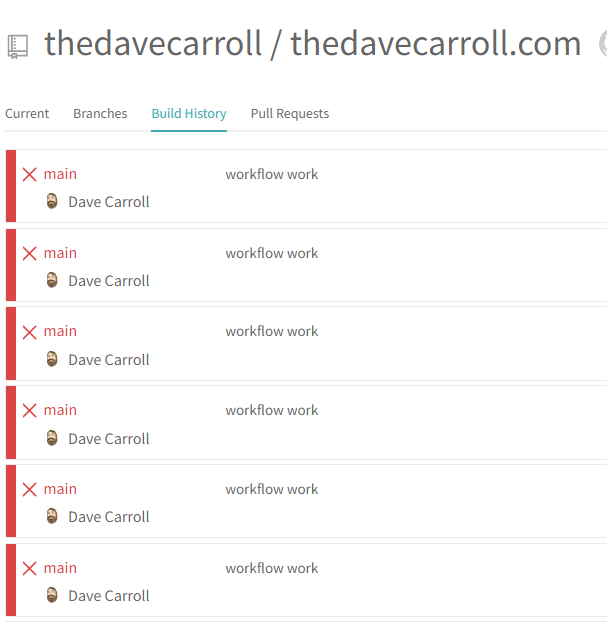
Jekyll is great, except when it’s not. My lack of experience with Ruby, Gems, and Jekyll itself surely is a significant, contributing factor for the often breaking of my Travis CI pipeline.
If memory serves, twice Travis CI updated its runners and broke my builds. And since there had been long time spans between some articles, it was often like throwing dice to see if it worked when I committed a new article to the repo.
Jekyll Docker Image
I’ve had significantly greater luck in building my site locally. (You are building your site locally to validate page layout, check for typos, etc. Right?)
For several months I simply had a PowerShell snippet to run the Docker image jekyll/jekyll:latest.
Often, I would forget where I put the snippet and would have to try to reinvent the wheel.
In May 2020, I added a docker-compose.yml file to the root of the repo that Docker would use to run the image.
After issuing a docker-compose up command, the site would be generated and served so I could browse to it on the host system.
The docker-compose command allows you to configure how Docker creates the container to run the image.
I mapped local disk volumes to image paths to retain the site after it’s built and to maintain the gem bundle cache. This allows me to completely delete the container and image or copy the path contents to another system.
The Jekyll Docker README and Docker’s documentation on Compose should provide you with enough information to get you started.
docker-compose
In my compose file, I added the multi-line command in order to include the jekyll clean command to clean up the destination folder, .jekyll-metadata, and .sass-cache.
Without the cleanup, the list of articles (the Articles link at top of any page) were not getting recreated.
GitHub Actions
Regarding the automated build and deployment to GitHub Pages, I knew that I wanted to simplify that process. There’s been a lot of development for—and adoption of—GitHub Pages since GitHub Actions were released in late 2019. I’d used them before and it only seem fitting that I turn to GA for my build and deployment automation.
When I realized that GitHub had published a set of actions for Jekyll, I knew it was the right decision (for me, at least). GitHub provides the following actions:
- Configure GitHub Pages - configure-pages
- Build Jekyll for GitHub Pages - jekyll-build-pages
- Upload GitHub Pages artifact - upload-pages-artifact
- Deploy GitHub Pages site - deploy-pages
They also provide several starter workflows and one, jekyll-gh-pages.yml, gave me enough to create the workflow below.
Workflow
I created the Publish Dave’s Technical Journal workflow in the ./github/workflows/ folder.
Next, I changed the branch that would trigger the workflow.
Even though GitHub provides a way to skip the workflow via a commit message, I preferred to have the default to not publish.
And I wanted to always publish when triggered manually via workflow_dispatch.
I checked the Workflow syntax for GitHub Actions documentation and saw there was an if conditional.
After a few minutes searching the internet, I found a StackOverflow question that gave me enough to create the following conditional.
if: github.event_name == 'workflow_dispatch' || contains(github.event.head_commit.message, 'publish')
Publish Dave’s Technical Journal
GitHub Pages Configuration
Originally, GitHub Pages would be deployed from an pre-configured branch to the GH page space.
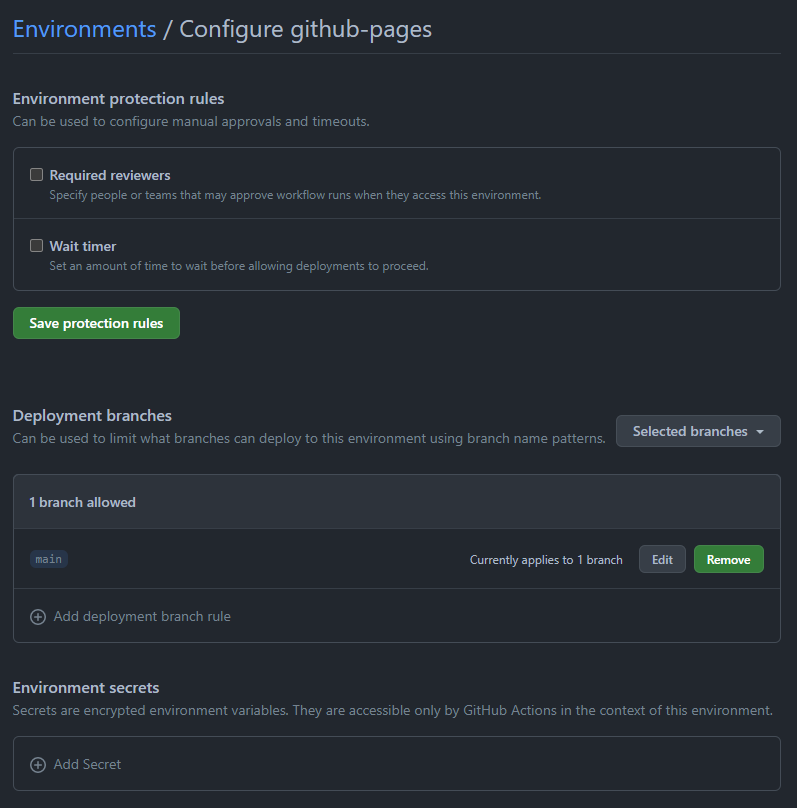
I needed to update my repo’s configuration to use custom workflows for build and deployment.
This resulted in a new environment being created.
You can customize each environment independently, enabling protection rules and adding secrets that only that specific environment can use.
Build Scripts
When I used Travis CI, I wrote two bash scripts that were my “build” scripts.
- cibuild
- executed the
jekyll buildcommand that generated the static html - ran
htmlprooferto validate internal html links
- executed the
- sitemap_ping
- pinged Google and Bing to let the search engines know my sitemap had been regenerated
The first part, building the static html, was now covered by the new workflow.
I attempted to get the htmlproofer working as a step, but ultimately didn’t spend the time to complete it.
I did include a step that mirrored the sitemap_ping script and quickly discovered that Bing no longer supported anonymous sitemap submissions.
They now direct users to adopt https://www.indexnow.org to notify Bing and other search engines of the latest site changes.
Wanting to stay focused (a daily struggle), I decided to not learn IndexNow now and, instead, put it off for another day.
Likewise, I decided to forego notifying Google search. I added that to my site’s ever-growing to-do list.
Site Comments
Most sites offer a way for readers to make comments allowing them to engage and be part of the conversation. When I rolled out my site originally, I used the Staticman Node.js application and their public API. Because the API is hosted on Heroku’s free tier, they reached capacity quite often.
In four years, my site has had a whopping 13 comments for 10 posts (about a third of my total posts). That’s probably the reason I hadn’t encountered any public API throttling or over capacity.
Staticman on Heroku
On Staticman’s GitHub repo, there is a nice Deploy to Heroku button.
Spoiler, I (eventually) clicked the button.
Since I didn’t have a Heroku account, I had to create one prior to deploying. The process seemed really simple and within a short time, I had my own copy of the Staticman API running.
I had to iron out one major issue before I could submit a comment successfully.
It had to deal with the encrypted reCAPTCHA secret in the staticman.yml and _config.yml files.
The Staticman application logs revealed that a part of my url was getting appended twice.
Once that was corrected, I was able to encrypt the reCAPTCHA secret, update my _config.yml file, and successfully register my blog with my Staticman API.
I submitted a test comment and voila! My site had Comments again! And the new GA workflow worked successfully to build the site and there was my “test” comment. That was a complete win and I felt really great about it.
14 hours later…
I received another comment.
Oh! And another.
And another.
And one more.
And, what’s going on!?
Oof. Spam.
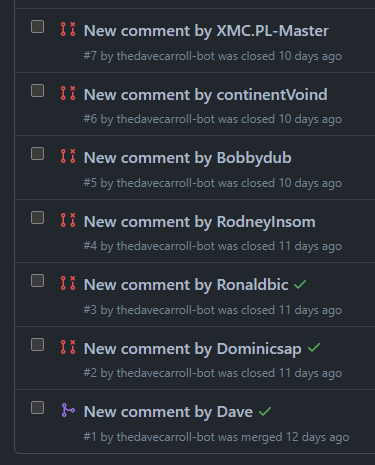
I closed two pull requests (didn’t merge the PR) and, unexpectedly, the GA workflow kicked off! Then I remembered, it was configured to run when a PR was closed, apparently regardless of whether it was merged or not. I prevented the workflow from doing that again and then proceeded to waste a few hours down the rabbit hole of attempting to get v3 of reCAPTCHA working with Staticman.
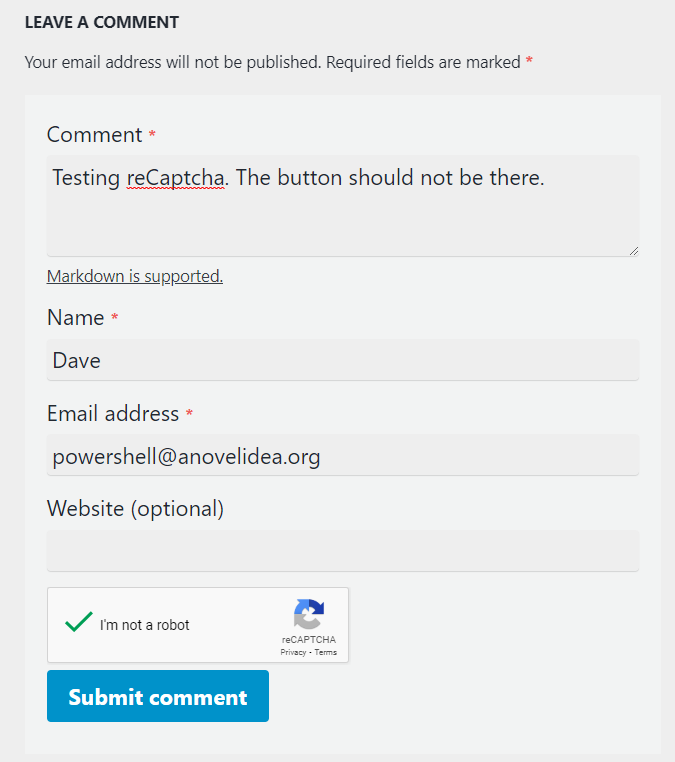
I wanted to provide readers with an easy, “no login” solution to submit comments. It was that very openness that made the comments form an easy target for spammers and bots. Dejected, I decided my focus needed to change from Staticman and reCAPTCHA.
In case you are interested, you can look at the the bad pull requests in my repo.
I deleted the feature branches that each comment created.
Giscus GitHub App
I considered abandoning comments altogether until an internet search deposited me at Andrew Lock’s article Considering replacing Disqus with Giscus. The idea of using Disqus was another rabbit hole, albeit shallower, that I decided to abandon. That detour cost me less than an hour.
I read the article and the giscus home page with instructions. The GitHub setup seemed easy so the next possible issue was if giscus support was built-in to my theme. I was glad to see that the Minimal Mistakes theme does support giscus as a comment provider.
I made the updates, waited the minute or so for the workflow to build and deploy the site, and then checked my work. And there it was, under the Leave A Comment section.
Since it’s integral to GitHub, a prospective commenter would need to login to GitHub and authorize the giscus app. You can always revoke access to the app should you feel it’s been compromised.

After I authorized the app, I was able to react and comment on the article.
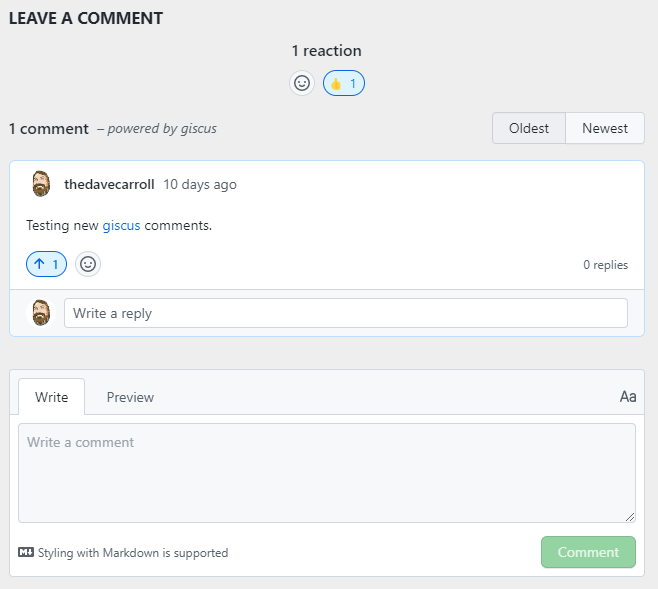
You can see the comment in GitHub Discussions.
As most of readers of my articles are likely IT professionals, there is a good chance that they already have a GitHub account. If not, wouldn’t it be great to be the catalyst for someone to create an account in order to leave a comment?
Configuration
It was a simple matter to answer a few questions, check or uncheck a few boxes, to get the configuration values from the giscus site.
After all your selections are made, the “Enable giscus” section provides a <script>...</script> block that you can add to your site’s theme.
Because my theme already supported giscus, I just had to update my config file with the corresponding values.
Instead of using the suggested GitHub Discussion category of Announcements, I created a new category called Site Comments selecting the Announcement format.
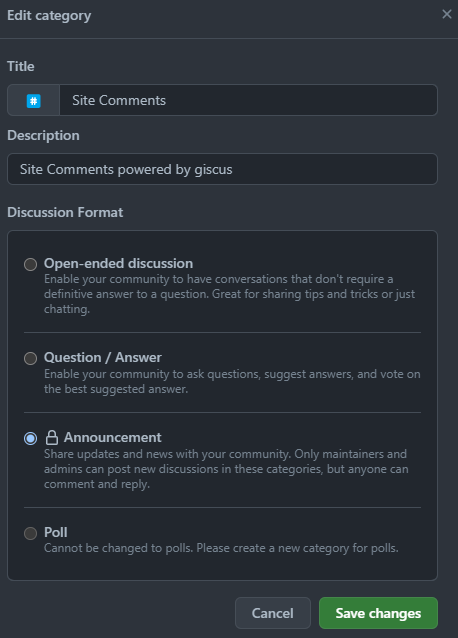
While backtracking my steps for my recall accuracy check, I realized that I overlooked giscus’ advanced usage guide.
It provides instructions on how to restrict the domains that can load giscus, as well as a few other methods of customization.
I’ve added the required giscus.json to my repo’s root.
Favicon
This blog originally had an image of my PowerShell tattoo as the logo and the favicon. A few months ago, I commissioned a new avatar from the ReverentGeek. I’ve been using it on all my thedavecarroll branded social media since.
As I worked with refreshing the blog, it was a simple matter to update the theme’s author avatar. The old favicon, however, kept staring at me. How did I generate that originally? A quick search brought me to a familiar site, realfavicongenerator.net.
The process is fairly simply, select your image and on the next page, make setting changes as needed for each type of favicon.
You thought there was only one?
I think the only thing that I customized was the path where the favicons would be hosted.
Since there are several files and I like seeing tidy folder listings, I opted to use /assets/images/favicon as the path.
The next step was to hit the button to generate the favicons and HTML code. It provided a zip package, instructions on where to extract it, and a chunk of HTML code.
<link rel="apple-touch-icon" sizes="180x180" href="/assets/images/favicon/apple-touch-icon.png">
<link rel="icon" type="image/png" sizes="32x32" href="/assets/images/favicon/favicon-32x32.png">
<link rel="icon" type="image/png" sizes="16x16" href="/assets/images/favicon/favicon-16x16.png">
<link rel="manifest" href="/assets/images/favicon/site.webmanifest">
<link rel="mask-icon" href="/assets/images/favicon/safari-pinned-tab.svg" color="#5bbad5">
<link rel="shortcut icon" href="/assets/images/favicon/favicon.ico">
<meta name="msapplication-TileColor" content="#da532c">
<meta name="msapplication-config" content="/assets/images/favicon/browserconfig.xml">
<meta name="theme-color" content="#ffffff">
When I first used the site initially building my blog, I had no idea how many different files and code that goes into the favicon. It’s quite a few.
Per the instructions, the HTML code had to go into the <head> section.
My theme has an _includes/head/custom.html that was designed for use by the site owner.
It makes adding custom elements to the <head> section easy.
The same site also provides a way to test the favicons once you have added them to your site.
Google Analytics
Unlike some sites, I don’t monetize this one because I’m personally not a fan of all the ads I have to sort through just to get to the content. I use an ad blocker which does its best to filter out superfluous ads, and for the most part, it does a good enough job. I do however like to know metrics on page views and visitors.
Universal Analytics
Since the blog’s inception, I’ve been using Universal Analytics (Google Analytics 3) for these metrics.
Here are just a few metrics for the entire time I have been using UA.
Landing Pages
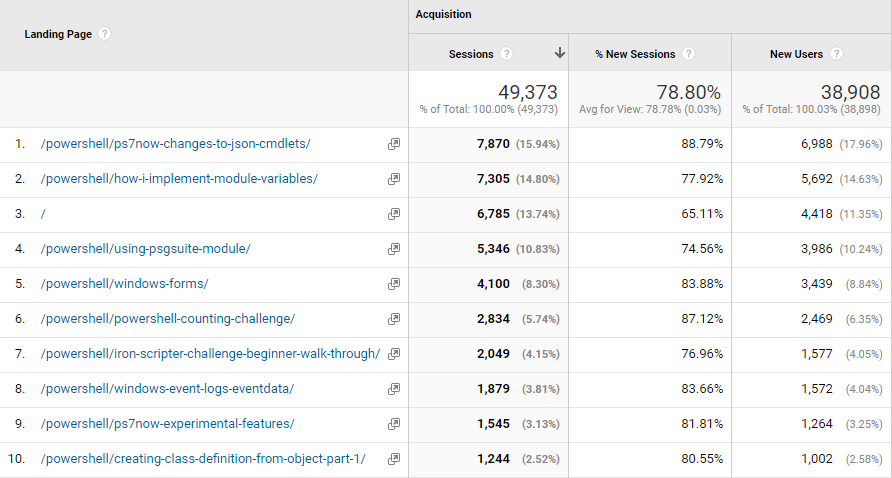
Sessions

Locations
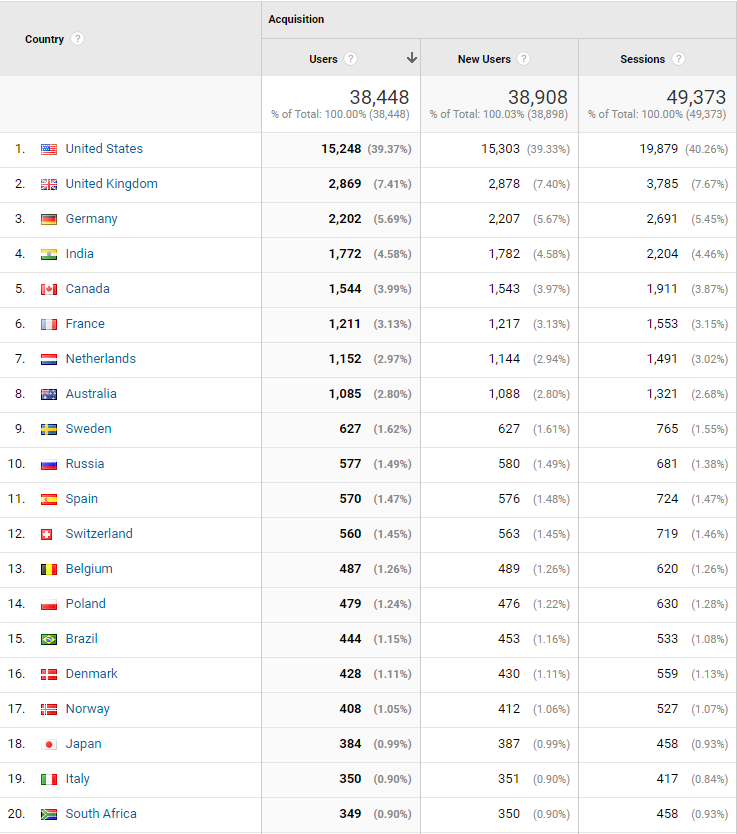
Google Analytics 4
For at least a year, I’ve been ignoring the frequent reminder from Google that they will begin to sunset UA, stop processing new hits, on July 1, 2023. Even though I had nearly a year before the deadline, I was already “under-the-hood” and wanted to get as much done as possible.
Assuming you already have a Google Analytics account and an existing UA property, setting up a new GA4 property is a simple as using the Setup Assistant.

This support document walks you through adding a GA4 property to a site that already has UA. Again, I was lucky that my theme already supported GA4. All I had to do was update the provider and tracking id.
Next Steps
Even with all of this work, I still have more to do.
Workflows
I want to create the following workflows.
- Publish Blog Drafts
- Even though I already have a workflow for this, it doesn’t work as smooth as I would like (the filename had an incorrect date prefix). And I would like to use PowerShell as the scripting language.
Note: I’ve already made some significant progress on this. Checkout out the Rename Draft Articles workflow in my site’s repo.
- Even though I already have a workflow for this, it doesn’t work as smooth as I would like (the filename had an incorrect date prefix). And I would like to use PowerShell as the scripting language.
- Announce New Article
- I want to use BluebirdPS to Tweet new articles after they are published.
- Announce Archive Article
- I want to Tweet an older article once or twice a month to cover any times when I’m in maintenance mode again.
- Ideally, I would like to validate the links, especially internal, before deploying the site.
- The standard publish workflow should include a sitemap or new article ping to Google and IndexNow.
Revive Social Media
When I reached out to PowerShell Twitter, Josh Rickard provided me a link to his revive-social-media repo which can submit a post to LinkedIn and publish a Tweet.
Whether I use that or not, I’m sure it will be helpful for LinkedIn postings.
Related Articles
I’ve noticed a high bounce rate for most visitors, meaning that they usually just read the article that brought them to the site then leave. That’s their prerogative, but perhaps there are other related articles that could interest them. Jekyll supports related posts, however, they are not random and are the last three or four articles which may not be on the same topic. I found this article that shows how to implement actual related posts based on tags or categories. This seems like a low-hanging fruit that I will tackle soon.
Theme Changes
The more I look at my site, the less I’m pleased with the aesthetics.
- My theme is full-featured and the design still looks current. Maybe I could find a theme that supports what I need and hopefully one that is a responsive design.
- My site currently does not support a dark mode, so adding this capability, ideally with a toggle on the page, would be a good idea.
- The site’s theme feel like it wastes a lot of screen real estate. The author profile is on each page and it takes a huge chunk. I’d like to use my avatar next to the site name in the title.
Summary
When I started writing this article, I had no idea that it would take well over a week to finish. I also had no idea that it would be over 3500 words. If you’ve made it this far, thank you for sticking with it! I promise the next several articles will not be this long.
I hope that this article does not dissuade you from considering Jekyll as your static site generator, that was not the intent. I wanted to reveal the struggles that I have had with it and how I overcame them. Some of them stemmed from the lack of the right mind-space which drained virtually any energy required to work on this site. As mentioned, my energy levels are starting to climb again and each new article you see means they are sufficient.
If you have any questions or comments, please leave them below (in the new giscus comment form!). And if you publish a blog using Jekyll, I’d like to hear how you have (or would) remediate any of the issues above.
Thank you, again.

Leave a comment